Back to products

YITH Booking and Appointment for WooCommerce WordPress Plugin With Lifetime Update.
$249.99 Original price was: $249.99.$34.90Current price is: $34.90.
YITH Event Tickets for WooCommerce WordPress Plugin With Lifetime Update.
$19.90
YITH Event Tickets for WooCommerce WordPress Plugin With Lifetime Update.
| Features | Values |
|---|---|
| Version | v1.24.0 |
| Last Update | 2023-04-11 |
| Documentation | Yes |
| All Premium Features | Yes |
| GPL/Nulled | No |
| Instant Installation Support | 24 Hrs. |
| Receive Updates on Email | Yes |
| Website Activation | 25 |
🌟100% Genuine Guarantee And Malware Free Code.
⚡Note: Please Avoid Nulled And GPL WordPress Plugin.
19
Items sold in last 3 minutes
136
People watching this product now!
Category: YITH Original
Description
YITH Event Tickets for WooCommerce WordPress Plugin With Lifetime Update.
The complete solution to manage and sell event tickets through your store.
How you can benefit from it:
- You can manage the entire process from ticket sale to the check-in.
- You can save money for commissions owed to those sites that are usually in charge of ticket sales by managing them on your site.
- With no intermediary, you will have full control over all your sold tickets.
- You can boost your income by scheduling an automatic increase of the base price depending on the purchase date.
YITH Event Tickets for WooCommerce Features.
- Set a different price for each “Event ticket” product
- Enable the automatic stock management for ticket sales
- Show the event start and end date on the product page
- Insert one or more input fields to acquire information related to the ticket the user is purchasing
- When the order completed the user will receive an automatic email including the ticket as an attachment
- PDF of event ticket can be downloaded from “My Account” page
- The user can view, download or print the ticket from “My Account” page
- Add a barcode to each ticket by using YITH WooCommerce Barcodes plugin (not included)
- Track all the tickets sold thanks to the dedicated section
- Take advantage of the integration with Google Calendar: the event is saved automatically in the buyer’s Google calendar
- Enable the sale of full price and, optionally, reduced-price tickets for the event
- Increase the ticket price when the availability is under the configured threshold
- Increase the ticket price when the event start date is approaching
- Remove or hide an expired event automatically New
- Allow selecting one or more additional services for the event: each service can have a cost and a limited availability
- Link a location to the event through Google Map services
- View the event organizers and the complete list of people who purchased one or more tickets in the event detail page
- Use the widget to show a calendar that helps the user to have a view of the events of the month in a fast way
- Enable file downloading after purchasing the ticket
- Search tickets by:
- ticket number
- ticket barcode (created by using YITH WooCommerce Barcodes)
- order barcode (created by using YITH WooCommerce Barcodes): the search returns the list of the tickets linked to the order
- Check-in for the ticket.
🌟100% Genuine Guarantee And Malware Free Code.
⚡Note: Please Avoid Nulled And GPL WordPress Plugin.
Reviews (0)
Only logged in customers who have purchased this product may leave a review.
Installation Process
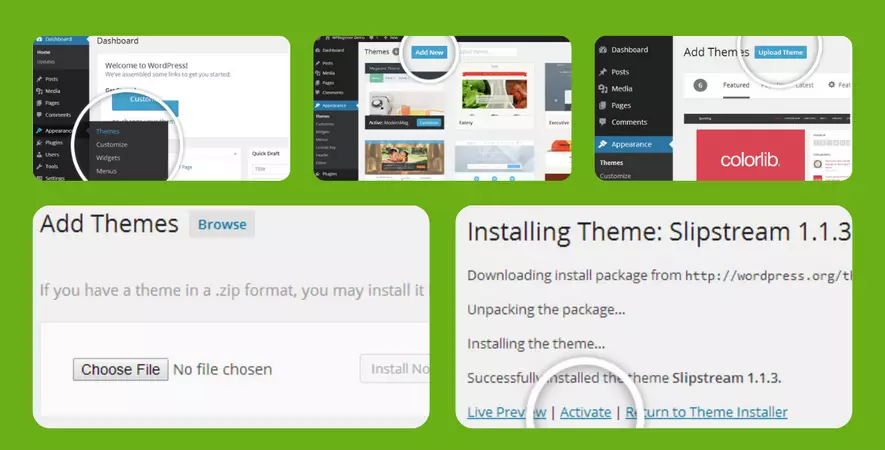
WordPress Theme Installation
- Download the theme zip file after purchase from CodeCountry.net
- Then, log in to your WordPress account and go to Appearance in the menu on the left of the dashboard and select Themes.
On the themes page, select Add New at the top of the page.
After clicking on the Add New button, select the Upload Theme button.
- After selecting Upload Theme, click Choose File. Select the theme .zip folder you've downloaded, then click Install Now.
- After clicking Install, a message will appear that the theme installation was successful. Click Activate to make the theme live on your website.
WordPress Plugin Installation
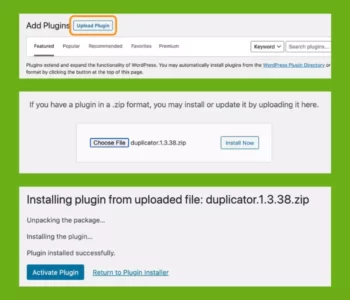
- Download the plugin zip file after purchase from CodeCountry.net
- From your WordPress dashboard, choose Plugins > Add New
Click Upload Plugin at the top of the page.
Click Choose File, locate the plugin .zip file, then click Install Now.
- After the installation is complete, click Activate Plugin.
Certification

This certificate represents that the codecountry.net is an authorized agency of WordPress themes and plugins.






Reviews
There are no reviews yet.