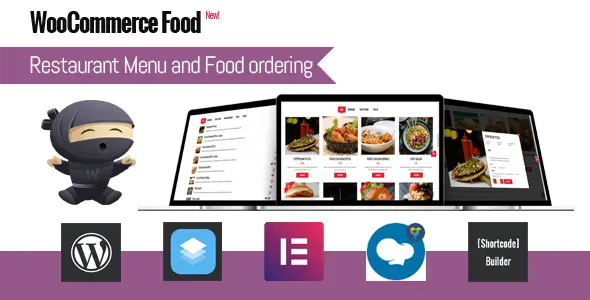
If you own a restaurant, café or food service business, WooCommerce Food is a must-have plugin. Designed to make ordering menu items seamless and hassle-free, WooCommerce Food is the simplest way for your business to display food items and for your customers to order. With the intelligent WooCommerce plugin, you can use a lot of payment gateways and manage everything from showcasing your menu to receiving and processing orders all from one handy place. For your customers this means a straightforward way to place an order and the very best user experience, ensuring they’ll be back – again and again.
WooCommerce Food Features list.
- 10+ Food Styles support
- Online Food ordering and manager via pro system of WooCommerce
- Food with extra options, you can create food with multi option types: Select box, radio button, checkbox, textarea, text, quantity
- Min/max option required for checkbox field
- Extra options by variation (create different option for each of variation)
- Extra options by conditional logic (show hide option by conditional logic)
- Copy/clone extra option – fast and easy way to clone/copy option
- Min/max quantity for each food or for each variation (not quantity of each extra checkbox radio option) .
- Fully responsive and mobile ready.
- Display menu via shortcode anywhere.
- Support with many columns(2, 3, 4, 5)
- Display Food menu with Grid, List, Table, Carousel(Slider view)
- Admin create Food and manage order easily via WooCommerce
- Order method: Delivery or Pickup or Dine-in
- Shipping radius: Limit shipping radius with google map API
- Shipping postcodes: Limit shipping with postal, zip code instead of radius
- Shipping Delivery fee, delivery fee by km or postal, zip codes or time slot
- Minimum order amount required to free shipping
- Email to admin and customer after order
- Food by location, You can set different food for each store location
- Food by order method, You can set different food for each order method: Delivery, Takeaway, Dine-in
- Open closing time
- Open closing time by location
- Enable/disable location for each order method
- Shipping fee for each location
- Minimum order amount required for each store location
- Print order invoice
- Email recipients by location You can set different email recipients for each location
- Ajax load more, pagination, popup food info
- Minimum amount, minimum amount by km, minimum amount for each order methods
- Delivery discount or Surcharge
- Dine in discount or Surcharge
- Takeaway discount or Surcharge
- Enable/disable payments by Order method (Delivery/Takeaway/Dine in)
- Order Calendar You can show Order delivery/takeaway/dine in on calendar
- ICal export You can export ICal file of Order delivery/takeaway/dine or import it to Google calendar
- Enable/disable date and time slot field in order
- Different time slot for each day of week
- Different date time for order methods (delivery, takeaway, dine-in)
- Different time slot for each location
- Maximum number of Order per time slot in order
- Disable order food before X minutes or X days time in order ( user need order food before X minutes or X days)
- Unlimited Color. You can set color for all or each food
- Filter by category – You can show filter by category
- Auto address complete, auto complete by special country with google map API
- Custom label color or icon like spicy, allergens….
- Opening and closing time for each day of week
- Opening and closing time from date to date
- Show Opening and closing time information in popup
- Multiple Payment mode support
- Support Paypal, Stripe and a lot of payments gateways with addon
- Admin filter order by status, location, order method, delivery time
- User page with register/login/history booking
- Coupon code
- Coupon code by order method
- Live notification with default WooComemrce mobile app
- Support display date, time and order method on default WooComemrce mobile app
- RTL mode support
- Custom food info
- Images gallery
- Unlimited customize with font, color
- WPBakery Page Builder support
- Easy configuration
- Automatically order printing with Star CloudPRNT (only work with star printer, Supported printer models are: Star TSP650II with HIX interface, Star mC-Print3, Star mC-Print2, Star TSP700II with HIX interface, Star TSP800II with HIX interface (currently limited to 80mm paper width support), Star SP700 with HIX interface)
- Automatically order printing with other printers If you don’t use star printer, you can use print node with this premium addon of WooCommerce to auto print order, or you can use BizPrint
- Compatible with Product Timer, you can enable food/product by date and time
- Compatible with Variations Radio Buttons, you can show variation as radio or grid view instead of select box
- And much more …
🌟100% Genuine Guarantee And Malware Free Code.
⚡Note: Please Avoid Nulled And GPL WordPress Plugins.









Reviews
There are no reviews yet.