

")
NextLife – Next.js Ecommerce CMS With Lifetime Update.
$15.90
| Features | Values |
|---|---|
| Version | v1.1.2 |
| Last Update | 29 March 2024 |
| Premium Features | Yes |
| Instant Installation Support | 24 Hrs. |
| Scanned By Virus Total | ✅ |
| Live Preview | 100% Working |
20
Items sold in last 3 minutes
107
People watching this product now!
Description
NextLife is a fully customizable eCommerce CMS built with Next.js and MongoDB. It’s easy to install and deploy, offering a fast performance and smooth user experience. With detailed documentation and support for multiple payment gateways, NextLife allows you to sell any type of product effortlessly.
Features
- Server-side rendering
- SEO supported and SEO friendly URL
- Responsive design
- Multiple payment gateways
- AWS S3 is used as the default file storage server
- Cash on delivery supported
- Category based product filtering
- Coupon
- Google Analytics support
- Facebook Messenger support
- Social media login
- Application colors change
- Analytics Dashboard
- Manage products and product types
- Manage orders and order status
- Manage coupons
- Manage shipping charges
- Manage Attributes
- Multi-currency supported
- Customizable page content
- Complete role-based staff access management system
- Refund system
🌟100% Genuine Guarantee And Malware Free Code.
⚡Note: Please Avoid Nulled And GPL PHP Scripts.
Reviews (0)
Only logged in customers who have purchased this product may leave a review.
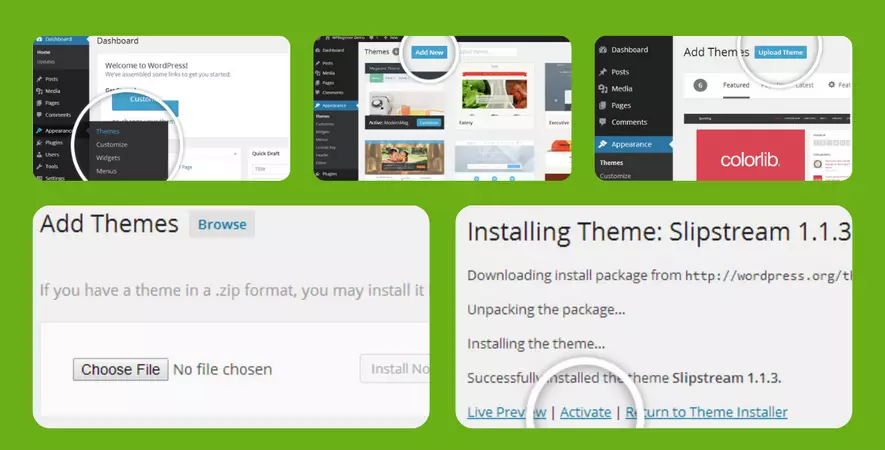
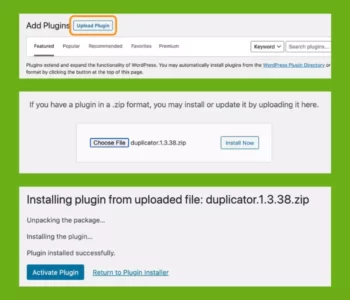
Installation Process
Certification


Reviews
There are no reviews yet.