Socially – Self-hosted Social Media Scheduler With Lifetime Update.

$22.90

Features Values
Version v1.2.0
Last Update 13 May 2022
Premium Features Yes
Instant Installation Support 24 Hrs.
Scanned By Virus Total
Live Preview 100% Working
20 Items sold in last 3 minutes
321 People watching this product now!
SKU: 36182 Categories: ,
Description

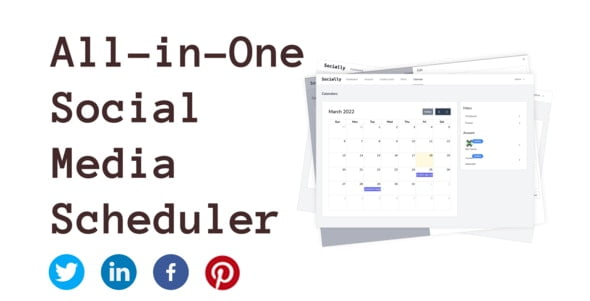
Socially is a self-hosted social media scheduler. A social media scheduler is an automation tool that helps you schedule social media posts for multiple social media accounts ahead of time. You can’t be active by yourself on social media all the time, so using a social media scheduler helps you be proactive.

What makes Socially great?

  • Fully responsive. Built with TailwindCSS, which is a mobile-first CSS framework. Socially works perfectly both on Mobile and PC.
  • Brandable. You are free to use any name, logo, and color to align the application with your branding. No restriction.
  • Unlimited. Unlimited social media accounts and posts since Socially is self-hosted. No more ridiculous monthly fees for forms.
  • Customizable. Full downloadable source code. Built with the latest technologies: Laravel + Livewire + TailwindCSS, you are free to customize any part of the system.
  • Modern Technologies: Tailwind, Alpine.js, Laravel, and Livewire. A full-stack development solution, built by Laravel community members.

    🌟100% Genuine Guarantee And Malware Free Code.

    ⚡Note: Please Avoid Nulled And GPL PHP Scripts.

Reviews (0)

Reviews

There are no reviews yet.

Only logged in customers who have purchased this product may leave a review.

Installation Process

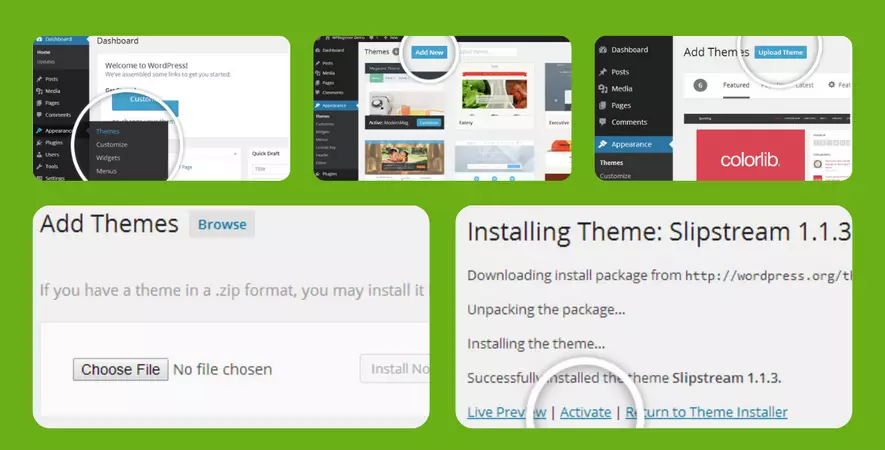
WordPress Theme Installation

  1. Download the theme zip file after purchase from CodeCountry.net
  2. Then, log in to your WordPress account and go to Appearance in the menu on the left of the dashboard and select Themes.
  3. On the themes page, select Add New at the top of the page.

  4. After clicking on the Add New button, select the Upload Theme button.

  5. After selecting Upload Theme, click Choose File. Select the theme .zip folder you've downloaded, then click Install Now.
  6. After clicking Installa message will appear that the theme installation was successful. Click Activate to make the theme live on your website.

WordPress Plugin Installation

  1. Download the plugin zip file after purchase from CodeCountry.net
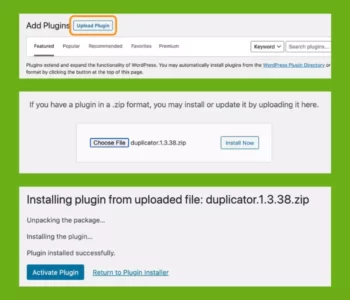
  2. From your WordPress dashboard, choose Plugins > Add New
  3. Click Upload Plugin at the top of the page.

  4. Click Choose File, locate the plugin .zip file, then click Install Now.

  5. After the installation is complete, click Activate Plugin.
Certification

This certificate represents that the codecountry.net is an authorized agency of WordPress themes and plugins.