YITH WooCommerce Product Add-Ons & Extra Options WordPress Plugin With Lifetime Update
$18.90
YITH WooCommerce Product Add-Ons & Extra Options v3.13.0 WordPress Plugin With Lifetime Update
| Features | Values |
|---|---|
| Version | v3.13.0 |
| LastUpdate | April 13, 2023 |
| All Premium Features | Yes |
| GPL/Nulled | No |
| Instant Installation Support | 24 Hrs. |
| Receive Updates on Email | Yes |
| Website Activation | 25 |
🌟100% Genuine Guarantee And Malware Free Code.
⚡Note: Please Avoid Nulled And GPL WordPress Plugin.
16
Items sold in last 3 minutes
162
People watching this product now!
Category: YITH Original
Description
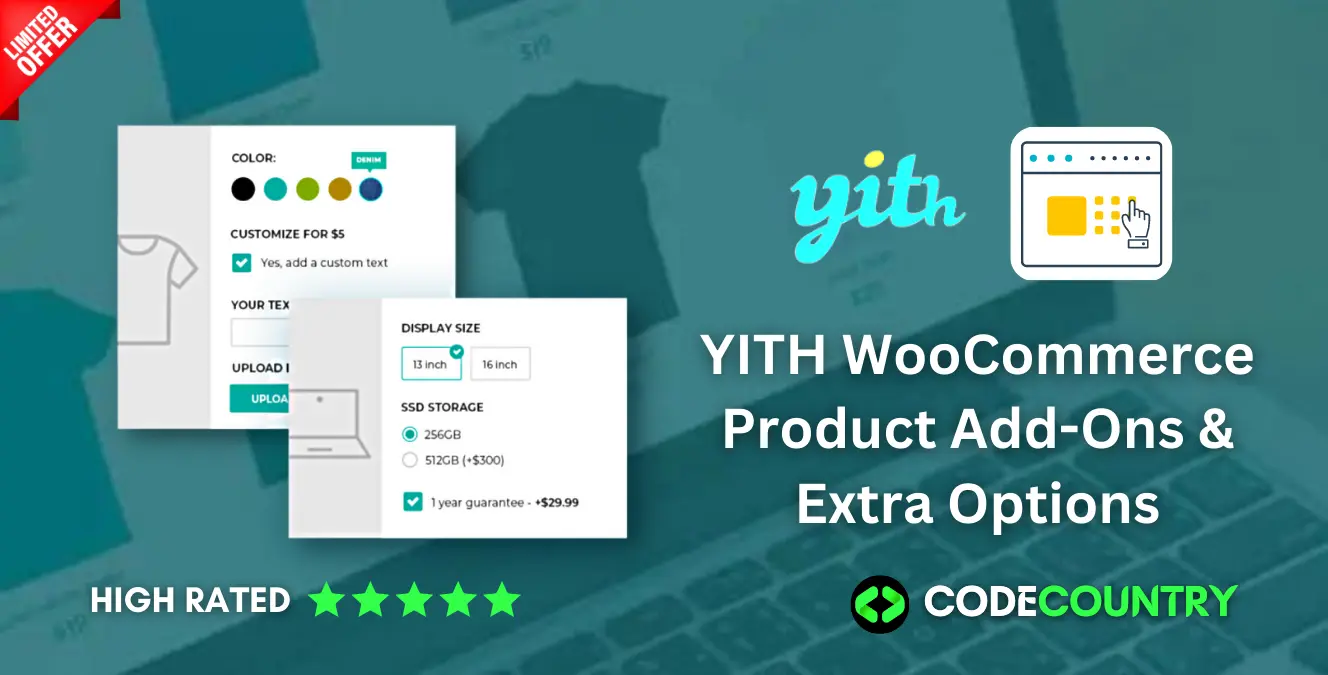
YITH WooCommerce Product Add-Ons & Extra Options WordPress Plugin With Lifetime Update.
Add paid or free advanced options to your product pages using fields like radio buttons, checkboxes, drop-downs, custom text inputs, and more.
How you can benefit from it:
- Offer additional services on your product pages (warranty, insurance, special transfer services, customizations, etc.) to increase the order value;
- Promote products that are either optional or related to the one the users are viewing to encourage them to purchase more items with the same order;
- Allow users to upload photos, images, or files to request a customized product;
- Configure your options by using the comprehensive library of elements included in the plugin: text fields, select dropdowns, radio buttons, checkboxes, images, date pickers, upload fields, color swatches, etc.
- Use images, icons, labels, and color swatches to show the available product variations;
- Set dependency rules to show different options according to the user’s selection (e.g., show an Upload field ONLY IF the user has selected the checkbox “Customize product”);
YITH WooCommerce Product Add-Ons & Extra Options Features.
- Create unlimited blocks of options
- Add unlimited options inside each block
- Show the block in all products/just specific products/specific product categories
- Add HTML elements in the options block: Heading, Text, and Separator (simple border; double, dotted or dashed border; empty space)
- Add radio type options
- Add input text options (with “limit input characters” support)
- Add select type options
- Add checkbox type options (square or rounded style)
- Set specific conditions to show or hide a block of options (e.g. show the option B only if the user sets “yes” in option A)
- Set specific conditions to show the additional options only on specific product variations (e.g. show the options only if the product variation “color black” is selected)
- Set the option as required or not
- Set the option as selected by default or not
- Choose where to display the options on the product page (before or after the “Add to cart” button)
- Enter an optional title for each block of options and choose which heading to use (h1, h2, h3, etc.)
- Enter a label and a description for each option
- Show an optional tooltip for each option
- Set if the option is free (product price doesn’t change when the option is selected)
- Set if the option has a fixed or % cost that will increase the product price
- Set if the option discounts the product price
- Set the options block background and padding
- Use the theme forms style or the custom plugin style
- Customize the colors for borders, texts, and accent color
- Set the tooltip colors and position (top or bottom)
YITH WooCommerce Product Add-Ons & Extra Options More Features.
- Hide the options from specific products
- Show the options to all users/only logged-in users/only specific user roles NEW
- Add “textarea” options (with “limit input characters” support)
- Add “color swatches” (with color selector and image support) NEW
- Add “number/quantity” options
- Add “label or image” type options
- Add “calendar date picker” type options (with advanced settings to set a default date, a start and end year, etc.)
- Add “file upload” type options with drag and drop support NEW
- Add “product” options to show linked products on the main product page NEW
- Upload an image to clarify what the option is about
- Choose whether to replace the main product image when the option is selected
- Choose the image position (above or under the label, on the left or right) NEW
- Choose whether to show or not the options set in a toggle collapse section
- Hide the option price
- Hide the option label and description
- Set how many options to show in each row NEW
- Enable the grid layout to adjust the options in a grid based on the page width NEW
- Set whether to multiply the product price by the length of the text inserted by the user (only for Text and Textarea type add-ons)
- Set whether to multiply the product price by the quantity the user selects for a certain option (only for “number” type add-ons)
- Set the first “X” selected options as FREE (e.g. the first 3 pizza toppings are free and included in the pizza price, but from the 4th topping the user will be charged an extra cost)
- Replace or not the default product price with the updated price when the user selects some paid options
- Show or not an options price total box on the product page
- Settings for the “upload file” option: text to show, enable the “upload” button or the textual link, set the file formats and the max file size allowed
- Set the checkbox style (square or rounded) NEW
- Set the color swatches size and style (square or rounded) NEW
- Set the image position for the “label/image” options NEW
- Force label images to the same height NEW
- Set the default position for the option label and description
- Choose whether to show the options in a toggle collapse section or not
- For each block of options, set whether the user can select only ONE of the options available or if can select MULTIPLE options
- For each block of options choose whether the user has to select a minimum, maximum or an exact number of options to be able to proceed to the checkout
- Hide the “Add to cart” buttons until the required options have a selection
- Show or not the selected options in the cart
- Show the image replacement in the cart
- Hide the selected options in the emails related to the order
🌟100% Genuine Guarantee And Malware Free Code.
⚡Note: Please Avoid Nulled And GPL WordPress Plugin.
Reviews (0)
Only logged in customers who have purchased this product may leave a review.
Installation Process
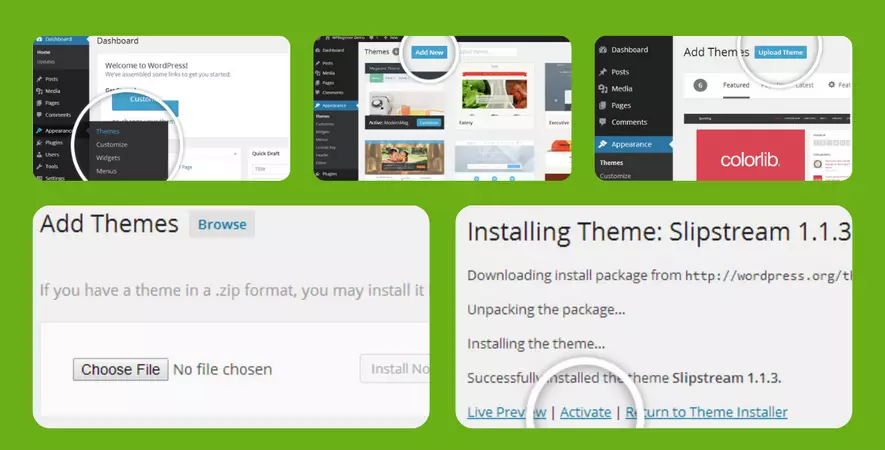
WordPress Theme Installation
- Download the theme zip file after purchase from CodeCountry.net
- Then, log in to your WordPress account and go to Appearance in the menu on the left of the dashboard and select Themes.
On the themes page, select Add New at the top of the page.
After clicking on the Add New button, select the Upload Theme button.
- After selecting Upload Theme, click Choose File. Select the theme .zip folder you've downloaded, then click Install Now.
- After clicking Install, a message will appear that the theme installation was successful. Click Activate to make the theme live on your website.
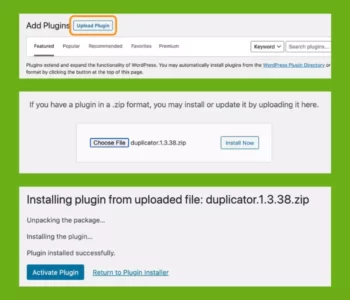
WordPress Plugin Installation
- Download the plugin zip file after purchase from CodeCountry.net
- From your WordPress dashboard, choose Plugins > Add New
Click Upload Plugin at the top of the page.
Click Choose File, locate the plugin .zip file, then click Install Now.
- After the installation is complete, click Activate Plugin.
Certification

This certificate represents that the codecountry.net is an authorized agency of WordPress themes and plugins.








Reviews
There are no reviews yet.