YITH WooCommerce Checkout Manager WordPress Plugin With Lifetime Update
$15.90
YITH WooCommerce Checkout Manager WordPress Plugin v1.25.0 With Free Lifetime Update
| Features | Values |
|---|---|
| Version | 1.25.0 |
| Last Update | March 21, 2023 |
| Documentation | Yes |
| All Premium Features | Yes |
| GPL/Nulled | No |
| Instant Installation Support | 24 Hrs. |
| Receive Updates on Email | Yes |
| Website Activation | 25 |
🌟100% Genuine Guarantee And Malware Free Code.
⚡Note: Please Avoid Nulled And GPL WordPress Plugin.
YITH WooCommerce Checkout Manager WordPress Plugin With Lifetime Update
How you can benefit from it:
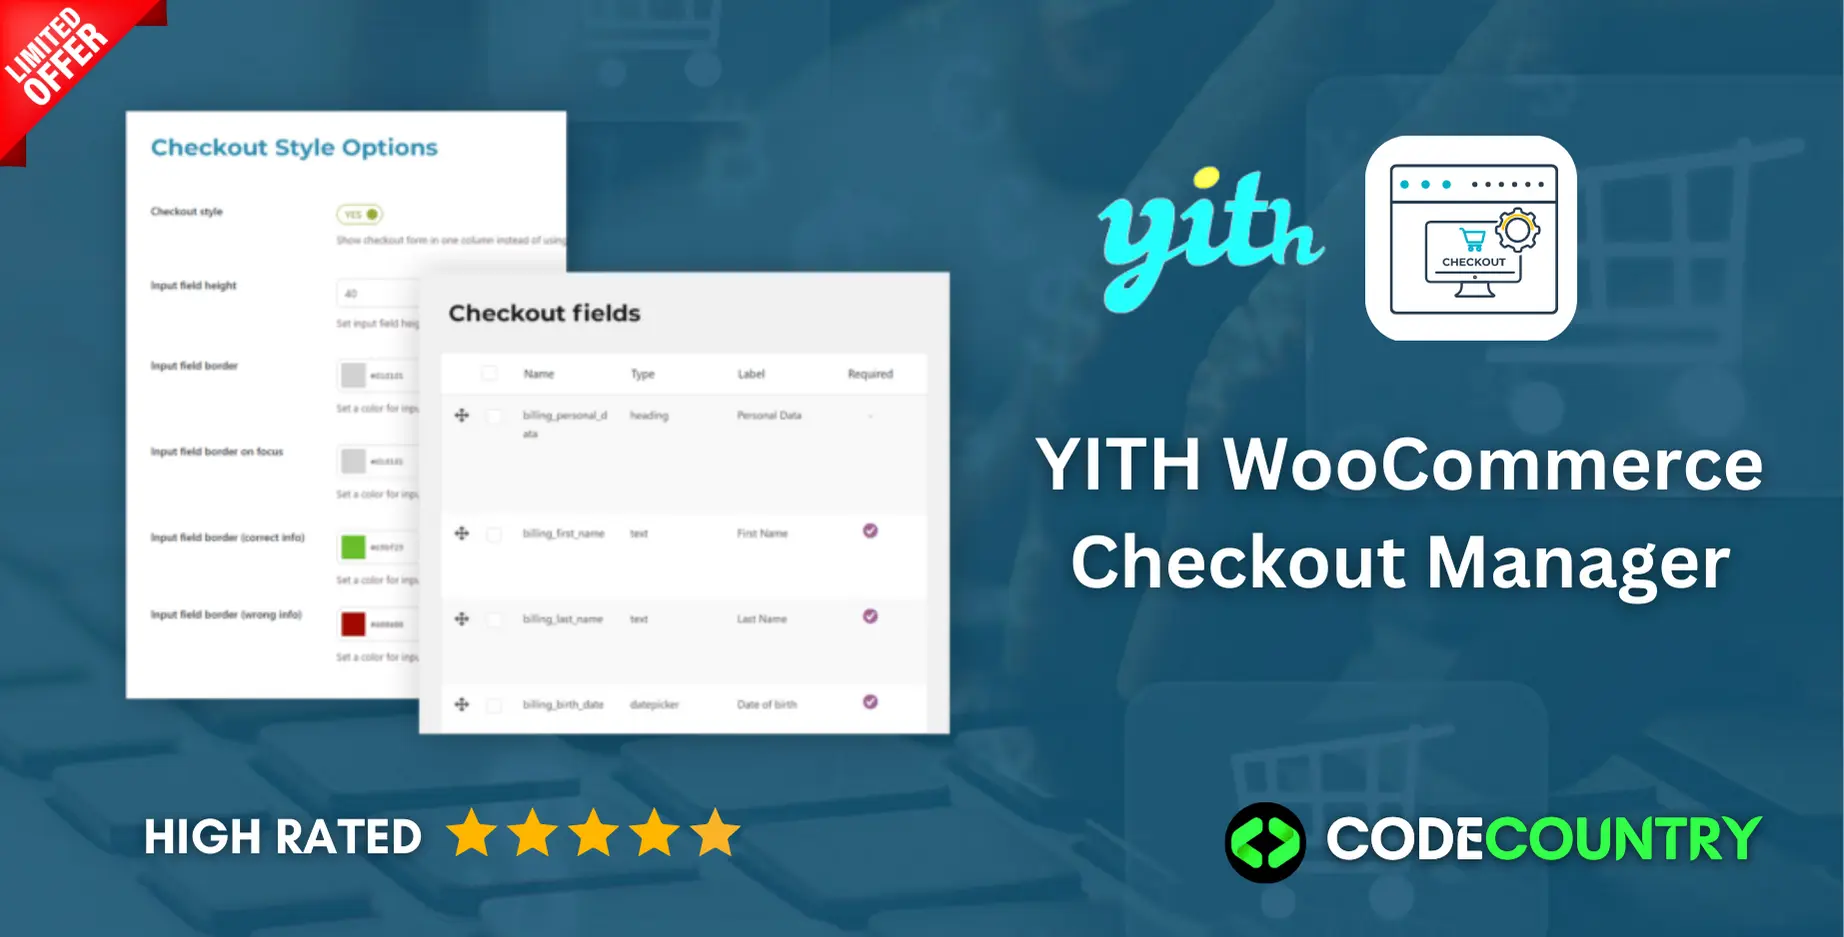
- You can create and add unlimited custom fields to your checkout page, show them as simple text fields, radio buttons, checkboxes, multiple selects and drag and drop them to arrange them on the page.
- You can improve the usability of your checkout page, customize the graphical appearance of every field and add labels and tooltips to help the user fill out the form with their information.
- You can customize the standard Shipping, Billing and Additional notes fields and choose whether to sort them in one or two columns (default WooCommerce option).
- Thanks to the Javascript Field Validation you can set up a real-time check of the input information in mandatory fields and ask the user to correct any possible error immediately before going on with the payment.
YITH WooCommerce Checkout Manager WordPress Plugin Main Features
With YITH WooCommerce Checkout Manager, you could add or remove fields, both text and check box, date picker, select and radio button in an easy way.
Furthermore, you could set a different style for data insertion fields, manage error messages and change their disposition.
With a few clicks, you will have an essential tool to improve your checkout page with outstanding performance.
- Choose which fields you wish to display during the checkout process
- Customize the shipping, billing and additional notes fields
- Add custom fields to the checkout process
- Create custom fields of different kinds, such as text or multiple select
- Customize the look of the checkout page
- Choose colors, labels and the tooltip you wish to display for the checkout fields
- Guide your customer through it in a dynamic way
- Enable Javascript Field Validation in order to display mandatory fields
- Choose the position of each field in the checkout process
- Using the Drag & Drop system you can move the fields wherever you want
- Choose the best layout for your checkout
- Use WooCommerce default style or set the fields on only one column
- Conditional fields
- Show or hide some fields in the checkout based on products/categories/tags in cart and on what the user selects in other checkout fields
- Take advantage of the WPML compatibility
- You are free to easily translate the plugin with the powerful tool offered by WPML
YITH WooCommerce Checkout Manager WordPress Plugin Features
- Customize the shipping, billing and additional notes fields
- Create custom fields of different kinds, such as text or multiple choice
- Choose colors, labels and the tooltip you wish to display for the checkout fields
- Enable Javascript Field Validation in order to display mandatory fields
- Using the Drag & Drop system you can move the fields wherever you want
- Choose whether you want the checkout to be arranged in a single row rather then two (as set by default on WooCommerce)
- Conditional fields: show or hide checkout fields based on products/categories in cart and/or what has been selected in other checkout fields New
🌟100% Genuine Guarantee And Malware Free Code.
⚡Note: Please Avoid Nulled And GPL WordPress Plugin.
Only logged in customers who have purchased this product may leave a review.
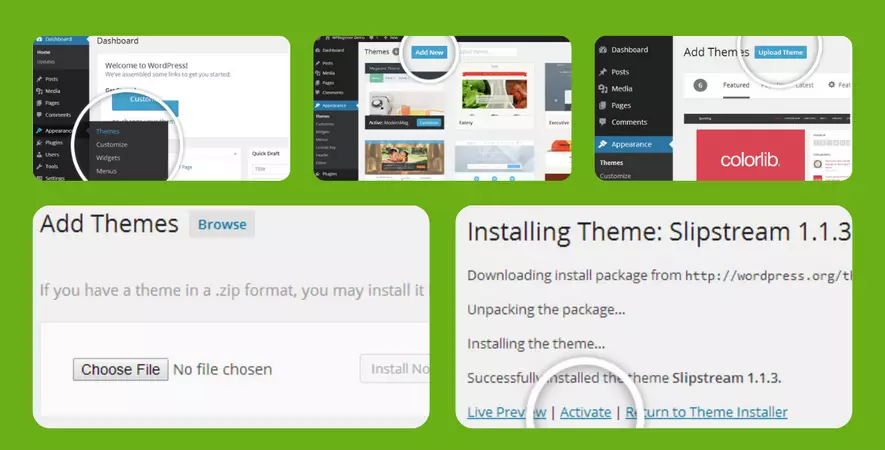
WordPress Theme Installation
- Download the theme zip file after purchase from CodeCountry.net
- Then, log in to your WordPress account and go to Appearance in the menu on the left of the dashboard and select Themes.
On the themes page, select Add New at the top of the page.
After clicking on the Add New button, select the Upload Theme button.
- After selecting Upload Theme, click Choose File. Select the theme .zip folder you've downloaded, then click Install Now.
- After clicking Install, a message will appear that the theme installation was successful. Click Activate to make the theme live on your website.
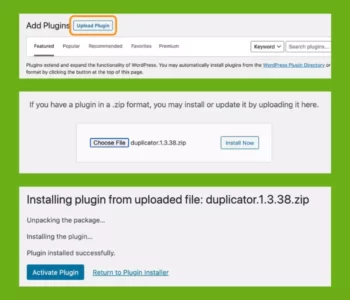
WordPress Plugin Installation
- Download the plugin zip file after purchase from CodeCountry.net
- From your WordPress dashboard, choose Plugins > Add New
Click Upload Plugin at the top of the page.
Click Choose File, locate the plugin .zip file, then click Install Now.
- After the installation is complete, click Activate Plugin.

This certificate represents that the codecountry.net is an authorized agency of WordPress themes and plugins.










Reviews
There are no reviews yet.